
If like me your entire home network is behind a shared VPN or there are other reasons you can't use port forwarding you have probably wondered how to reliably access your Home Assistant instance remotely. Luckily the wonderful Home Assistant community has you covered!
There are a a multitude of ways to achieve this so I'm going to restrict this article to two very reliable methods, those being routing through TOR and tunneling through SSH.
SSH Tunneling
Setting up SSH tunneling requires some prerequisites to be in place in order to work. Primarily you need to have either a VPS or Server that is connected to the public internet and you have full control over. OpenSSH needs to be installed, configured and running on this machine.
Because this approach relies on both a remote server and your Home Assistant instance I will specify the steps required on a per-environment basis.
In HomeAssistant:
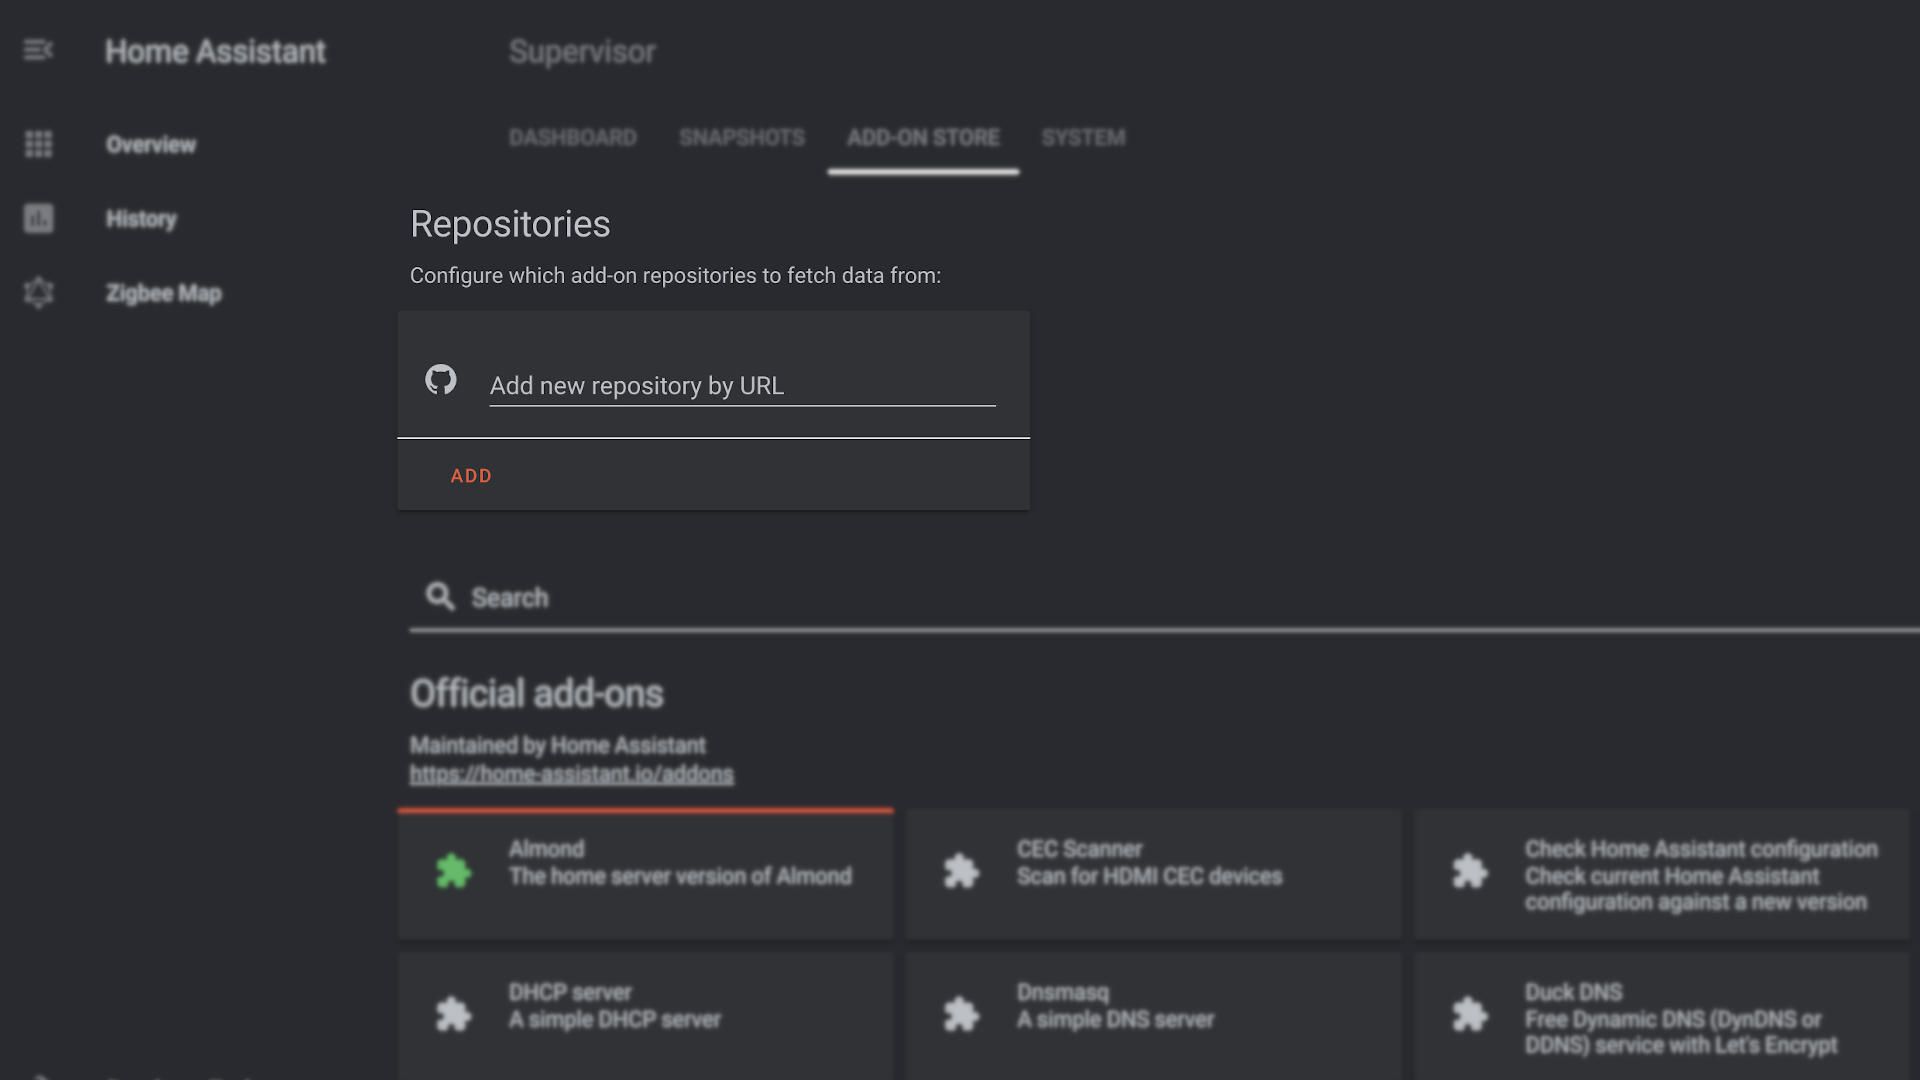
For this tutorial we will use the autossh add-on which we can install through the Supervisor Add-on Store.
- In Home Assistant navigate to Supervisor -> Add-on Store.
- add this custom respository: https://github.com/pjcarly/hassio-addons.
At the time of writing I quickly reviewed the code in the repo and found nothing suspicious but you should always be careful not to blindly add respositories. Personally I forked this repository to my personal GitHub account so I can maintain some level of control. - Install the
Autosshadd-on by clicking install. - Start the Add-on
When you start this add-on for the first time it generates a public and private key pair. This key pair will be used to connect to your remote server.
During first run it shows you the generated public key in the logs section as shown below. If not directly visible hit the refresh button on the add-on log at the bottom. The key should look similar to this:
ssh-rsa AAAAB3NzaC1yc2EAAAADAQABAAACAQDDFnD+a+hYAH7FZLyJTz8kSBvV1qGiHu7mdQIcmqfwR8w6/h7hoIblihFLw4s90/hO5Tzu75x/RxJcv2YSd9wIYB3konruPDndL8hCQWFJ8gb38ISlNRkN03+AoFp1/KEoixWxNCzUU6fVoXyN2RJQsJVt9MetHV2mgnIPIpxjhyQjZd6dA0w6ZuPRbsoRwSlCoy+qv0y5uYvwTs0fLQbiBkkQNirBD3U1q2Cl1d3cneER7pXkHX4FhRgictK7a+8NhIDvpLSjGBQzbIE9ZD+mv280eVRKe8AnUPkMv19X/stXlYeyQPprCJWOg6/m5sblz86XPZW1PUbNU/eWtTC9UE/NxoiC2q3I1zSIT5apZu+pmMmUmG5LrWiU+JWHqFVVgYXNnn+PXExgm1E+T48IU8kZvLC0LVDgD7oOFfwMWNQnXgm7nwtmiyHrmc5cvDkCoQM0rUGt9pEFVoup47eMu+sdWV9gFpSjMorzHs2nVIxW4SQuaj1Fn78W6MkUmsYifqqPl6bwosSEdKv34moehMeU5bkeLdjooidvRN3noT2UbBWfAQsSz5TYdaiFE7hrexdOR7AwaVRq7Ou36j1Jwh3l2u+AvACNJwYdFpqeHPGUKaQZvCWs5lp8qCEjcAzn1+j1YLwrcguehVex8EwKGB/ioLdBhQex1pRJaHALbw== [email protected]Because the add-on itself hasn't been configured yet, nothing else will happen.
- Stop the Add-on
On your public server:
It is optional however strongly advised (for security reasons) to create a dedicated non-priviliged user for tunneling this instance to your server. This user needs to be able to SSH and needs to have your private key whitelisted in the authorized_keys file.
sudo adduser homeassistant
su homeassistant
mkdir ~/.ssh
echo "<YOUR_PUBLIC_KEY>" > ~/.ssh/authorized_keys
chmod 744 ~/.ssh
chmod 600 ~/.ssh/authorized_keys
Configure SSH daemon
In your /etc/sshd/sshd_config make sure the following parameter is present (and not commented out) and set to this value:
GatewayPorts clientspecifiedBe sure to restart your ssh daemon after this change.
sudo systemctl restart sshd.service
NOTE: If at this point you can't seem to connect using your newly created user you might need to add it to the list of allowed ssh users in the above config (`/etc/sshd/sshd_config`) and restart the service once more:
AllowUsers <YOUR_SSH_ALLOWED_USERS>
Configure Nginx
The final step and cherry on top is to configure your reverse proxy.
server {
    listen 80;
    listen [::]:80;
    server_name hass.example.com;
    return 301 https://$server_name$request_uri;
}

server {
     listen 443 ssl http2;
     listen [::]:443 ssl http2;
     server_name hass.example.com;

     ssl_certificate /etc/letsencrypt/live/example.com/fullchain.pem;
     ssl_certificate_key /etc/letsencrypt/live/example.com/privkey.pem;

     location / {
        proxy_pass http://127.0.0.1:4431;
        proxy_http_version 1.1;
        proxy_set_header Upgrade $http_upgrade;
        proxy_set_header Connection 'upgrade';
        proxy_set_header Host $host;
        proxy_cache_bypass $http_upgrade;
    }
}Using TOR
There is also plugin called TOR that gives you a pretty much zero-config way of accessing your instance remotely albeit with some caveats.
Using this method basically involves simply installing the Tor Add-on and pressing start. If you then look at the Add-on's log you are presented with your own uniquely generated TOR .onion address.
It might look something like this:
https://d2ya34syq97oejab.onion:8123

Where things get a tiny bit more complex using this method over the SSH tunneling is that the TOR network is basically a separate network alongside the regular open web as you might know it. So in order to visit your Home Assistant instance you need to use either a dedicated browser like the Tor Browser or set up a TOR client service on your local device and proxy your regular browser to said service.
Downloading and running the TOR browser is quite easy though but you might find that it's not as fast or convenient as visiting the regular web.
It also requires TOR (or some other TOR compatible client) to be installed on every device you would like to use Home Assistant on. This means your Smartphone, Work computer etc. And it's not even a given that all networks allow you to install or even connect to the TOR network. So while this method is WAY easier to set-up it comes with it's own set of drawbacks.
Bonus method:
As a heavy Home Assistant user I love seeing this project thrive and evolve so I have to talk about a third method of accessing your instance remotely, Home Assitant Cloud by Nabu Casa. This is a premium solution that comes with a small pricetag (details can be found on the linked page) but all proceeds go directly towards the Home Assistant project and it's developers so it's definitely something to consider.
I won't go into all the details of setting this up as this is extensively documented in the Nabu Casa documentation.

Comments