NFWHAT??
NFTs or Non Fungible Tokens are tokens of authenticity and/or ownership that are publicly visible and distributed in a public ledger like a Blockchain. They offer a way to liscense digital goods/art and distribute ownership and royalties. In a nutshell it gives artist several tools to make money from their art and regulate it's ownership.
In this article I will be mainly focusing on how to get started with selling your own artwork and take your first steps in this new and exciting world of digital art exchange.
Tezos
First things first, for this article I will be using an NFT platform called "Hic Et Nunc" or "HEN" for short. At the time of this writing this platform trades exclusively using a cryptocurrency called Tezos. This may change in the future.
The Tezos network is a Proof of Stake based Blockchain network centered around peer-to-peer transactions and smart-contracts. Tezos has been around the block(chain) for a while now and is trading at a relatively stable value. For the sake of keeping this ELI5 I will not elaborate too much on Tezos network in this article but if you want to read more I encourage you to read up on it at their officical website.
Getting your first Tezos
In order to be able to offer your artwork and receive payments on HEN you need to set up a Tezos wallet and have some Tezos in the bank.
I would recommend to have at least 0.5 Tezos to get started. This is necessary since you need to be able to pay the required tiny fee to set up the token transactions. It won't nearly cost you all of the 0.5 Tezos but this gives you some wiggle room to offer multiple tokens.
There are several ways to buy some Tezos, it's quite a popular token and traded on many trustworthy exchanges. I always recommend Kraken since they have a spotless reputation and offer both SEPA deposits to trade your fiat for crypto but also allow for direct crypto purchases through Credit Card if you're in a hurry.
Setting up your Tezos wallet
If you don't already have one, create a Tezos wallet. I would always recommend using a hardware wallet as much as possible but sometimes the world is not an ideal place and you are left stranded for device support. Since we'll be trading NFTs on HEN we are limited by the wallets they support. At the time of writing these are:
- Spire
- Temple Wallet
- Galleon
- Kukai Wallet
- Umami
- AirGap Wallet
Several of these wallets should be considered bad options since development has stopped and they are no longer supported by their respective developers. This leaves us with quite a limited set of choices and I personally went with Kukai Wallet. This is a web-based wallet so there's no need to install anything on your system.
Kukai does support Ledger hardware wallets but sadly no Trezor or other brands. So the next best thing if you own another brand other than Ledger is to generate a SEED phrase and go from there.
Once you have your wallet set-up you should send over the Tezos you just bought on your favorite exchange to your newly created wallet on Kukai. You can do this using the Withdrawl action on your exchange. As soon as the funds are in place you are totally ready to rock and offer your first NFT!
Offering your first NFT
You might know that sometimes when people are really smart and their technology is very sophisticated they seem to not prioritize user experience? Well this is definitely the case with HEN so when doing the following steps bear with me as we get into some really messy UI design.
Step 1: Sync up your accounts
Go to https://www.hicetnunc.art and click sync at the top right next to the menu. This will prompt you to sync with one of the supported wallets we talked about in the section above. Let's just assume going forward that you went with Kukai. So in the dialog click Kukai Wallet.
If your browser is hardened properly like we went over in our hardening-firefox-for-privacy article you probably have to allow for HEN to open pop-ups. Once allowed you will be directed to a new tab bringing you to your wallet on Kukai (if logged in of course, otherwise be sure to log into your wallet at this point).
Your Kukai wallet should now be synced to HEN. You can verify this to be the case by looking at the top right corner, instead of showing sync it will now show you a few characters of your wallet address.
Step 2: Create your "OBJKT"
It's time to get creative now! This is the part where you have determined what image/video creation you would like to offer up for sale. Think long and hard (or just pick anything you can find). Once you've decided on your awesome creation it's upload time!
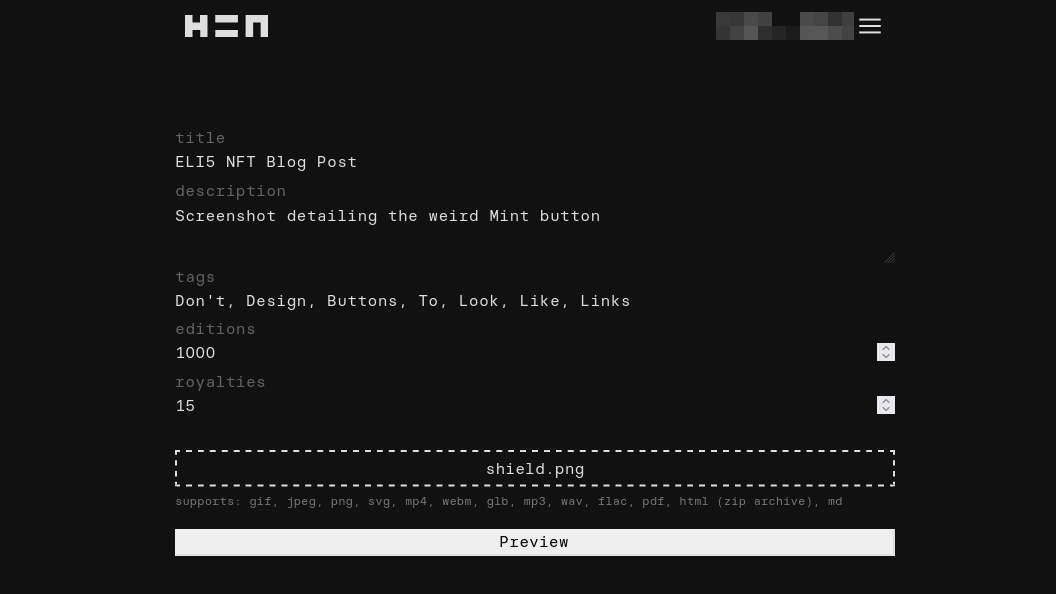
In the main menu at the top right go to OBJKT (mint). This will lead you to a form to submit your artwork. Most things here are pretty self-explanatory but you might stumble upon a few oddball questions:
- Editions
- Royalties
Editions are the maximum supply of the artwork you're uploading. So let's say you want to keep your creation very exclusive it would have only 1 edition. This also means only 1 person can have ownership and only one purchase can be made. Probably this also increases the price you can ask for it since it has some exclusivity.
You can set this to whatever you like however keep in mind that sometimes it's better to sell 1000 editions of 0.1 Tezos than it is to sell 1 edition at a price of 50 Tezos. Also 0.1 Tezos could be a 'fun buy' so quality might not be that important. As soon as you're going into a higher price-range quality will have to be on par in order to realistically sell your work.
Royalties is the percentage you'll be receiving of the transaction when someone re-sells your artwork. So let's say someone bought your work at 0.1 Tezos but somehow manages to re-sell it for 50 Tezos because it is just THAT good :-P you get whatever percentage of this transaction according to the royalties set in this field. I tend to go with either the default 10% or 15%. Feel free to experiment!
Once you are done it shoud look something like this:
All that's left now is to click Preview and in the next screen click the super awkwardly styled Mint OBJKT button below the preview. This will result in HEN preparing your submission.
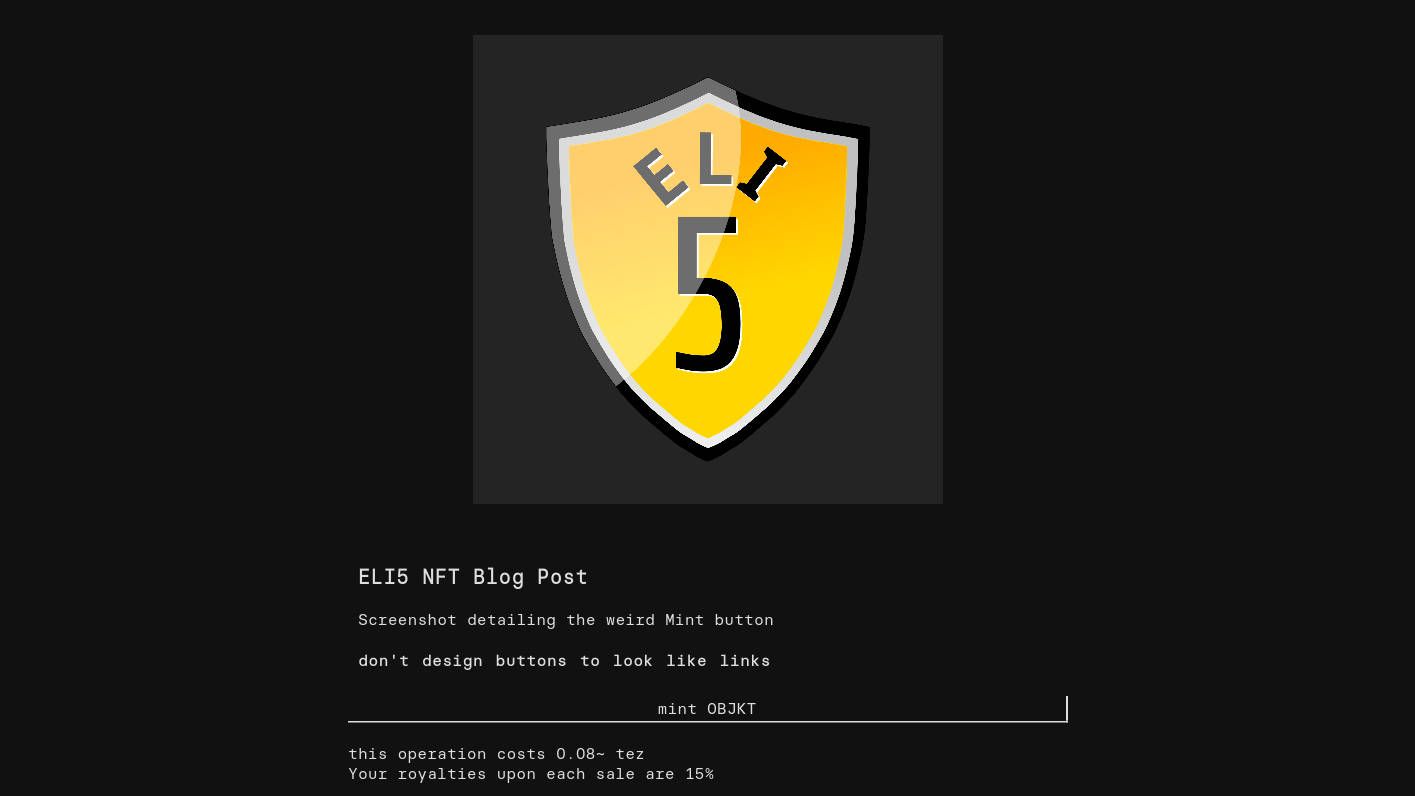
During this process it will send a transaction to your Kukai Wallet. You need to approve this transaction so be sure to keep your eyes peeled on your wallet since it won't notify you properly, it will just show up sometime shortly after submitting your artwork. Once you receive the dialog in your wallet simply leave everything at default settings and approve the transaction.
Your artwork is now part of the Tezos network, congratulations! You are now a bonafide tech hipster and can tell everyone at work and parties you own an NFT and look all fancy and interesting!
Step 3: Set your price and enable swapping
But wait... I did not set a price yet! What gives! Well next an finally we'll be enabling trades on your NFT. In the main menu at the top right select Manage assets. This will take you to a gallery of all the NFTs you own. Click your newly created NFT and at the detail page go to the tab swap.
Once there you can set the amount of editions you wish to offer up for swapping/trading. So if in the previous step you set your editions to be 1000 you may offer at a maximum 1000 in the OBJKT amount field here. But you can also keep several editions to yourself and only offer for instance 900 to the market, this is your own decision to make.
Finally it's time to set the price for a single edition by filling in the Price per OBJKT field. If you have a lot of editions and you want to sell a lot of them quickly I would advise not exeeding the 0.1 Tezos mark here. But with lower supply you might raise that price to whatever you think is fair or whatever you think someone is willing to pay for it. Again thi sis entirely up to you! But high number of editions and low pricing yields better short-term results and is nice to get you started.
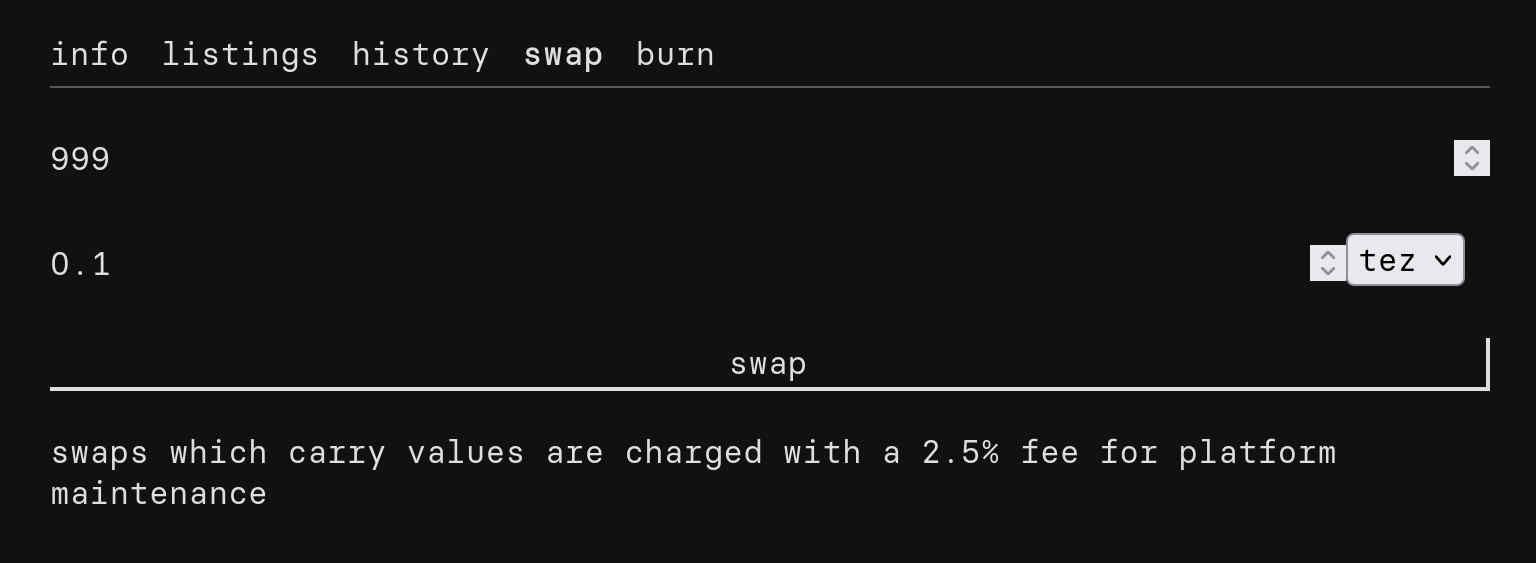
When you're happy about your choices simply click the swap button at the bottom and voila! Your artwork is now for sale! you can keep track of how many editions have been sold and the current availability of the editions in your Manage assets overview and clicking to the detail page of your NFT. Once you have some purchases it's also nice to know that there's a history tab on the detail page as well. This shows you all transactions in a nice list.
You are now the proud owner (or are you still?) of your very own NFT! Now go make some art and earn some Tezos!

Comments